When I first learned how to clean CamelBak, I realized just how important proper reservoir maintenance is for safe hydration during hikes and workouts. The CamelBak Cleaning Kit comes with everything you need—a Reservoir Brush, Tube Brush, Cleaning Tablets, and even a Cleaning Tether—to make your step-by-step cleaning fast and effective.
I always start by disassembling the reservoir, using the bladder cleaning brush and hydration tube cleaner to scrub the drinking tube, CamelBak Reservoir, and Big Bite Valve. Whether you’re maintaining a Crux Reservoir or a basic CamelBak Hydration System, this method helps remove mold, eliminate odors, and keep your hydration gear hygiene top-notch.
I learned to clean after every use, rinse thoroughly, and dry completely using a reservoir drying hanger, which is now part of my regular outdoor gear care. These gear cleaning tools also double as a great sports bottle cleaner, and I’ve found this to be the best way to clean CamelBak, especially when I want to deep clean hydration system parts like the CamelBak mouthpiece, clean water bladder, and clean CamelBak tube or clean CamelBak bladder with ease and confidence.
If you’re wondering how to use CamelBak cleaning kit properly, just follow this natural cleaning procedure and treat your gear like the essential hydration pack it is.
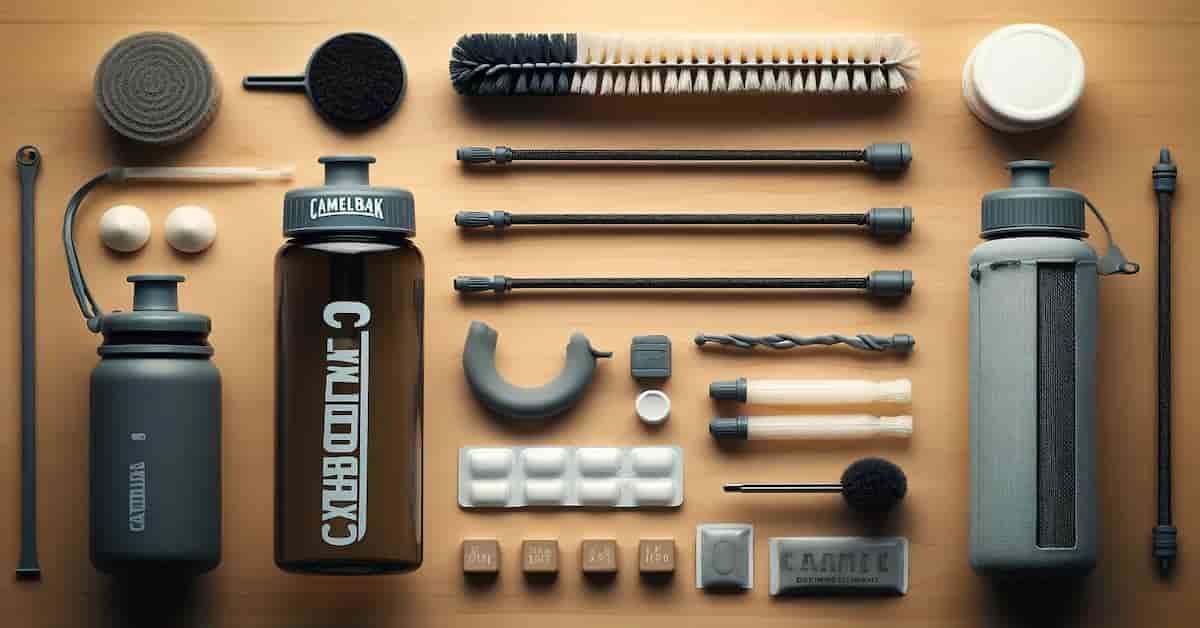
Table of Contents
⭐ Quick Ratings
| Feature | CamelBak Cleaning Kit | Osprey Hydraulics Kit | Platypus Cleaning Kit | Generic Brush Set |
|---|---|---|---|---|
| Ease of Use | ⭐⭐⭐⭐⭐ | ⭐⭐⭐⭐ | ⭐⭐⭐ | ⭐⭐⭐ |
| Effectiveness | ⭐⭐⭐⭐⭐ | ⭐⭐⭐⭐ | ⭐⭐⭐⭐ | ⭐⭐ |
| Durability | ⭐⭐⭐⭐ | ⭐⭐⭐⭐ | ⭐⭐⭐ | ⭐⭐ |
| Cleaning Versatility | ⭐⭐⭐⭐ | ⭐⭐⭐ | ⭐⭐⭐ | ⭐⭐⭐ |
| Value for Money | ⭐⭐⭐⭐ | ⭐⭐⭐ | ⭐⭐⭐ | ⭐⭐⭐⭐ |
🧼 What’s in the CamelBak Cleaning Kit?
| Item | Purpose |
| Reservoir Brush | Scrubs interior of hydration reservoir |
| Tube Brush | Cleans inside the long drinking tube |
| Drying Frame | Keeps bladder open for drying |
| Cleaning Tabs (optional) | Deep cleans and deodorizes gear |
Whether you’re cleaning a CamelBak water bottle, Eddy+ cap, or full hydration bladder, the tools included in the official CamelBak Cleaning Kit are purpose-built to make the job fast, simple, and effective.
🛠️ Step-by-Step: How to Use Your CamelBak Cleaning Kit
Step 1: Disassemble Your Gear
- Remove the cap, straw, bite valve, and reservoir (if using a bladder).
- Separate all parts to allow for thorough cleaning.
Step 2: Use the Big Brush for the Reservoir
- Wet the reservoir with warm (not hot) water.
- Add a few drops of dish soap.
- Use the reservoir brush to scrub all corners.
Step 3: Scrub the Drinking Tube
- Wet the tube and insert the long flexible tube brush.
- Gently slide back and forth to remove residue or mold.
Step 4: Clean the Bite Valve & Cap
- Use a small brush or straw brush for the bite valve.
- Scrub inside and out.
- Pay special attention to small seals or flaps.
Step 5: Optional: Use CamelBak Cleaning Tablets
- Fill the reservoir with water and drop in a tablet.
- Let sit for 15-30 minutes, then rinse thoroughly.
Step 6: Dry with the Frame
- Use the CamelBak drying hanger or prop the reservoir open.
- Let all parts air dry completely before storing.
🧪 CamelBak vs. Other Cleaning Kits: Which Is Best?
| Feature | CamelBak Kit | Osprey Kit | Platypus Kit | Generic Brushes |
| Reservoir Brush | ✅ Yes | ✅ Yes | ✅ Yes | ✅ Yes |
| Tube Brush | ✅ Yes | ✅ Yes | ✅ Yes | ✅ Yes |
| Drying Frame Included | ✅ Yes | ❌ No | ❌ No | ❌ No |
| Cleaning Tablets | ✅ Optional | ❌ No | ❌ No | ❌ No |
| Fits All Bladder Types | ✅ Yes | ❌ Limited | ❌ Limited | ✅ Most |
The CamelBak Cleaning Kit offers a complete system—especially helpful for families, adventurers, and athletes who use their hydration gear daily.
🧽 Cleaning & Maintenance Tips
| Task | Recommended? |
| Use of Dish Soap | ✅ Yes |
| Soaking in Vinegar | ✅ Occasionally |
| Bleach (Diluted Only) | ✅ Very Occasionally |
| Boiling Components | ❌ No |
| Freezer for Drying | ❌ Not Needed |
Pro Tip: Clean your reservoir after every use—especially if you add electrolytes, juice, or flavored drinks.
❓ Frequently Asked Questions
How do I clean my reservoir?
To clean your reservoir, empty and air-dry after each ride, then every few rides use the CamelBak cleaning kit—with brushes and cleaning tabs—to deep clean and prevent mold. Pro tip: if it’s hard to fully dry, store it in the freezer to block bacteria growth.
How do I wash my CamelBak reservoir before first use?
Before first use, fill the reservoir halfway with warm, soapy water, shake it well, then raise the drink tube and bite valve as you squeeze to move water through. Rinse thoroughly, drain completely, and hang to dry completely—or use a reservoir dryer.
How do I clean my eddy or Chute plastic bottles?
For Eddy or Chute bottles, pop off the bite valve and straw, wash in warm, soapy water or the dishwasher’s top rack. For deeper cleaning, soak in a mild bleach solution, then rinse well and shake dry.
🏁 Final Thoughts: Is the CamelBak Cleaning Kit Worth It?
Absolutely! If you’re serious about keeping your CamelBak gear clean, odor-free, and long-lasting, this cleaning kit is a no-brainer. It pays for itself by preventing bacterial build-up and gear replacement.
✅ Pros & ❌ Cons
Pros
- Includes all tools needed
- Drying frame is a game changer
- Designed to fit CamelBak parts perfectly
- Improves hygiene and gear lifespan
Cons
- Slightly higher price than generic kits
- Tabs not always included
🛒 Where to Buy the CamelBak Cleaning Kit
- CamelBak Official Website – Direct from the source
- Amazon – Convenient and often bundled with tablets
- REI & Sporting Goods Stores – Great for hands-on buyers
📑 Related Posts
- How to Clean CamelBak Bite Valves
- Best CamelBak Bottles for Kids & Adults
- Troubleshooting: Why Your CamelBak Tastes Weird
- The Ultimate Guide to CamelBak Bite Valves: Hydration Made Easy
Got any pro cleaning hacks? Drop them in the comments or tag us online. Stay fresh, stay hydrated! 💧

